Neglected Nail Rescue: How to Do Nails at Home
By
3 years ago
Nail SOS

In need of a pick-me-up? Give your nails a makeover with Nathalie Eleni’s no nonsense guide.
Nail SOS: At-Home Nail Rescue
Gel removal
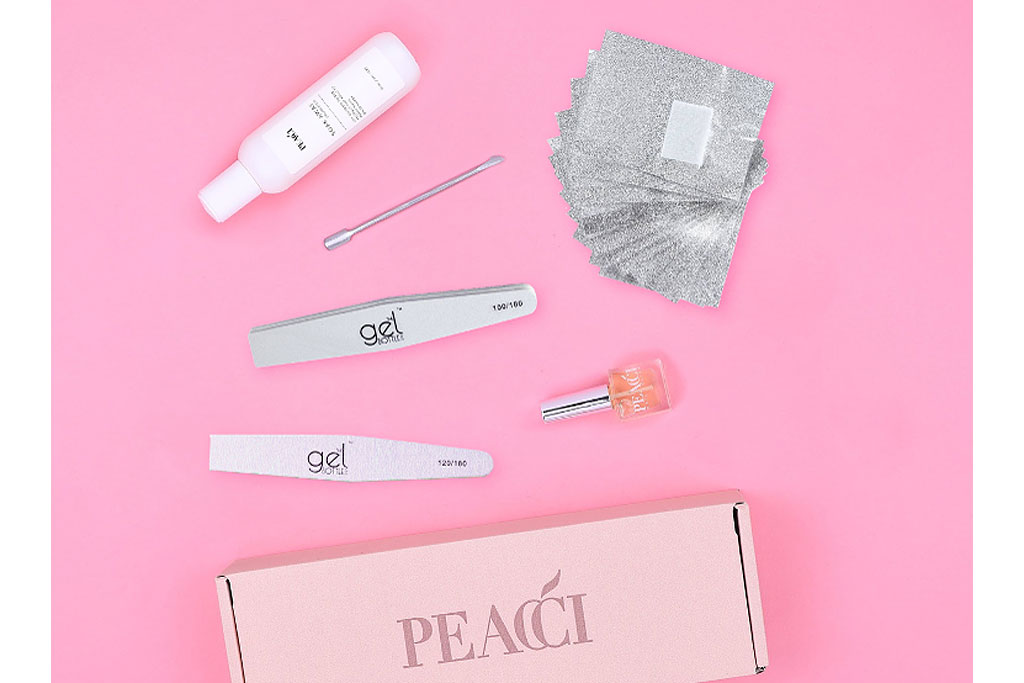
There is nothing more annoying than grown out gels that you are desperate to take off, but DO NOT PICK! It may be tempting but trying to peel off old gels will really damage your nail plate, causing flaking and thinning nails. Thankfully for your nails, Peacći has launched The Removal Kit (£20) to safely remove a gel or acrylic manicure whilst ensuring nails remain healthy. You apply the soak away acetone to foil pads and wrap them round your fingers so they can safely lift off your gel polish.
It comes with a buffer block and a cuticle pusher which will gently peel the gel off the nail once it’s disintegrated. Finish with the cuticle oil massaged around the whole nail plate.

Peacći Removal Kit
Home Manicure
If you are tired of looking at bare or chipped nails typing across your keyboard, then give yourself a DIY manicure. CND™ has created a handy guide, the 5-point polish method, to help you create the best possible manicure at home. CND Vinylux features an Italian-designed ergonomic brush that makes it much easier to paint your nails in a smooth controlled way, it is also longer lasting than most regular polish and contains keratin, jojoba and Vitamin E. The base coat is incorporated into the varnish so will save you time steps.
Step 1
Remove excess polish from the brush on the side of the bottle and then apply a thin line of colour along the free edge of the nail to seal it and ensure complete coverage.
Step 2
Pull the brush from the bottle scooping a small bead of polish on one side. Place the bead in the centre of the nail to avoid flooding the cuticle then lift the brush up and ease towards the cuticle line. This technique allows the brush to fan out for precise application – a tiny margin should be left between the cuticle and the polish. Glide the brush from the cuticle back down towards the free edge to complete this stroke leaving even coverage on the centre of the nail.
Step 3
Rotate the finger right and using the left side of the brush apply colour over the left side of the nail. Follow the contour of the side wall as closely as possible from the cuticle line to the free edge. Do not re-dip the polish for steps 3 and 4 there should be enough polish to cover the nail completely.
Step 4
Rotate the finger left and using the right side of the brush apply colour over the right side of the nail. Follow the contour of the side wall as closely as possible from the cuticle line to the free edge.
Step 5
Repeat steps 1-4. The second colour layer will provide additional colour and any free margins can be perfected with this layer. Repeat all steps with your preferred top coat.
Colour Crush
If you are just looking for a little lockdown fun, brighten isolation days with a fun and fabulous shade that perhaps you wouldn’t normally wear to the office; when you work from home, anything goes! My pick of the best colour crushing varnishes:
Featured image: Getty
MORE BEAUTY:
DIY Self Care: Natural Beauty Hacks / How to Pamper at Home / Luxury Face Oils (& How to Use Them)


